This method is a little more technically rigorous than just taking a picture of yourself in the scene you want, but has the advantage that you are able to completely escape the limitations of your current reality.
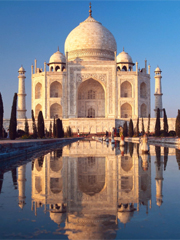
Want to float the Amazon River? Climb Mt. Everest? Visit the Taj Mahal? No problem. Maybe you want to attend the Olympics, the Tour de France, or Burning Man. Heck, maybe you want to win the Olympics! You can use photo editing software to create a believable picture of yourself in any situation you can imagine.
Any photo editing software that supports layers will work, such as Photoshop, its less expensive sibling Photoshop Elements, or the free alternative Gimpshop. I’ll write these instructions generically enough that you should be able to follow them using any photo editing program.
How to put yourself in the picture
1. Start with a digital picture of the place you want to go (or be, or do, or have, or work).
We’ll call that the background picture. You may be able to download an appropriate picture from that destination’s website. If not, use Google Image Search to find a good photo. Open the picture in your photo editing software.
2. Open a picture of yourself in a second window.
As we discussed in Put yourself in the picture, you want a photo of yourself that looks like you might really be there. For example, you might be wearing clothing that would be appropriate for visiting that place.
3. Resize the picture of yourself to match the scale of the background picture.
This step may not be necessary, but in most cases you’ll need to adjust the size of your photo so that you are proportionally believable. For now, resize the whole picture, background and all. In Photoshop you would use the menu command Image > Image size.
4. Select the picture of yourself, and copy it to the clipboard.
Use a lasso or square selection tool to outline an area of the photo that includes yourself. It’s not necessary to get the selection exactly right – we’ll erase the extra background later. When you have selected the piece you want, select Edit > Copy.
5. Paste the photo of yourself into the background picture.
In most programs you’ll select Edit > Paste from the menu to put the picture of you on a new layer in the background picture. Move the picture of yourself around until it’s in the right location.
6. Erase the extra old background from the picture of yourself.
You can now make edits to the “you” layer without affecting the original background photograph below it. Use your eraser tool to remove extra pieces of the old background around yourself. This leaves only the photo of the new background behind you showing through, and it now looks like you’re standing or sitting in that place!
7. Save the picture.
In Photoshop use File > Save for Web. Save it as a JPG file.
8. Put it someplace where you’ll see it.
You can automate repetitious exposure to the image with one of the many delivery techniques we’ve already discussed, such as installing it in your computer background, screensaver slideshow, Google Photos gadget, or Hipster PDA.
That was too hard!
For the technically challenged, don’t despair. Next week I’ll show you how to do the same thing using nothing more complicated than scissors and glue!
Other articles in the Put yourself in the picture series
- Put yourself in the picture
- Get a gorilla to hold the camera
- Put yourself in the picture to get a job
- A great digital camera
- Put yourself in the picture with Photoshop (you are here)
- Put yourself in the picture with glue
Leave a Reply